

Deliver exports to your SFTP or FTP server
To deliver Exportify exports to your SFTP or FTP server, open the template’s Delivery settings, enter the host, port, username and folder, choose password or SSH key login, save, run Test connection, then ask support to switch delivery on.
Exportify uploads automated export files directly to a folder on an SFTP or FTP server that you or your fulfilment partner control. The file lands where the receiving system reads it, with nothing to download or forward.
This works for both kinds of automated export:
- Automatic per-order exports, where a file is produced for each new order.
- Scheduled exports, where one file covering a time window is produced on a schedule.
What you need before setting up SFTP delivery
Section titled “What you need before setting up SFTP delivery”You need an SFTP or FTP server and a user account for Exportify to log in with. Ask the people who will receive the files, or your IT contact, for:
- the host name (for example
sftp.example.com) and port (usually 22 for SFTP, 21 for FTP and FTPS) - a username created for Exportify, with permission to write to a single folder and nothing else
- a password, or tell them you would prefer SSH key login and Exportify will provide the key
- the folder path the files should be uploaded to (for example
/inbound/orders)
If your IT team looks after the server, send them the Exportify guide for IT teams. It covers the account, its permissions, SSH key login and everything else they usually ask.
How to set up SFTP or FTP delivery
Section titled “How to set up SFTP or FTP delivery”-
Open the template’s delivery settings. In Exportify, go to Settings. Each template that can be delivered by SFTP shows a Delivery settings button next to it. You can also open a template and use Delivery settings in the page header.
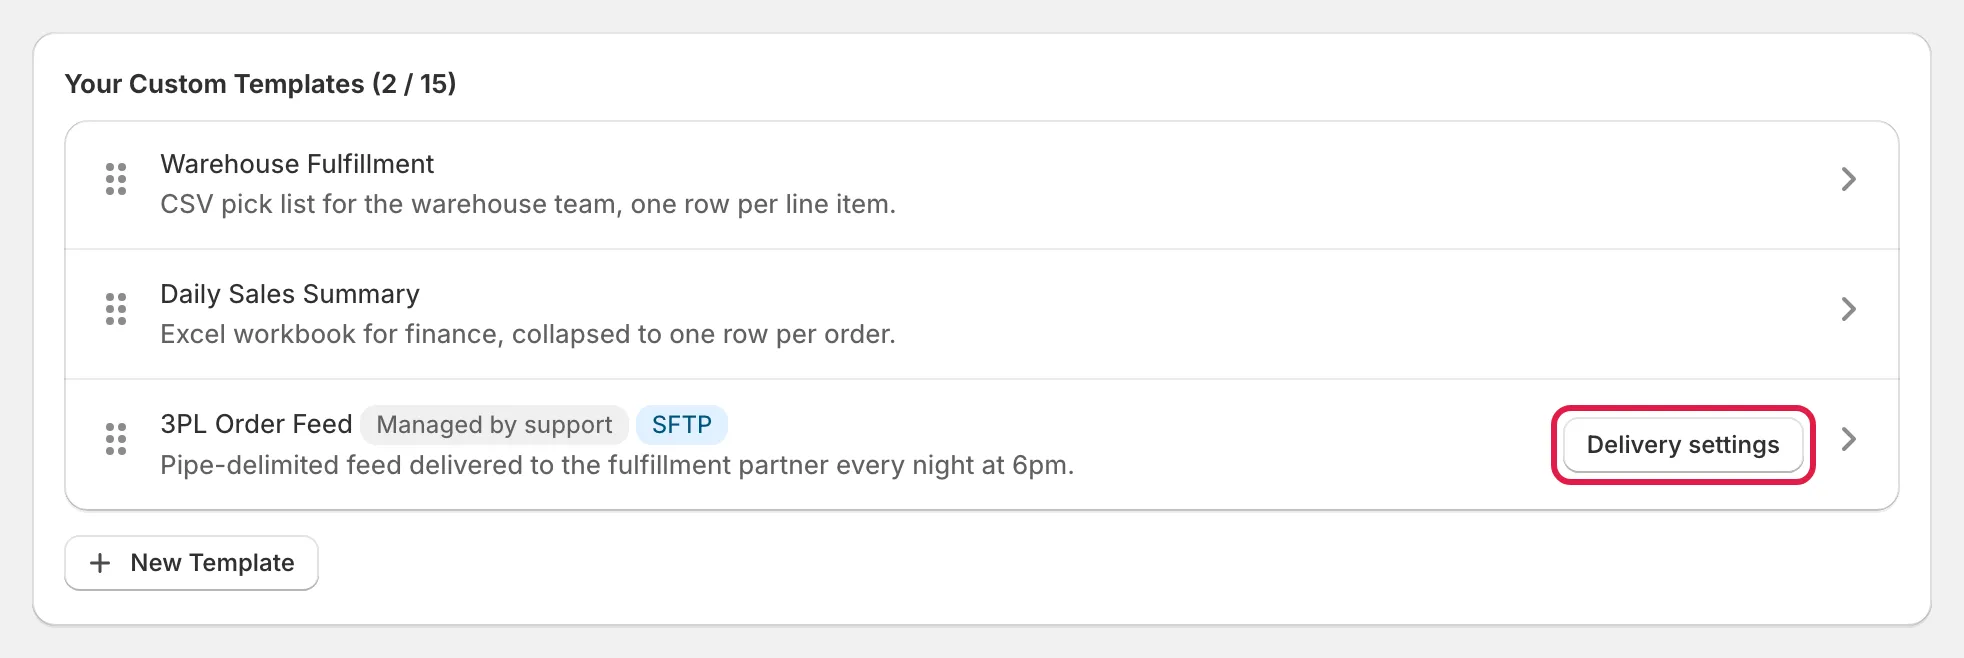
Settings page: the custom templates list, with the Delivery settings button beside a support-managed template highlighted -
Enter the server details and save. Fill in the protocol, host, port, username, login method and remote path. Choose SFTP where you can: it encrypts the connection. FTPS encrypts it too, and plain FTP does not. Credentials are stored encrypted and are never shown to support. If the template is managed by support, its layout and schedule stay managed by support; only the delivery server is edited here.
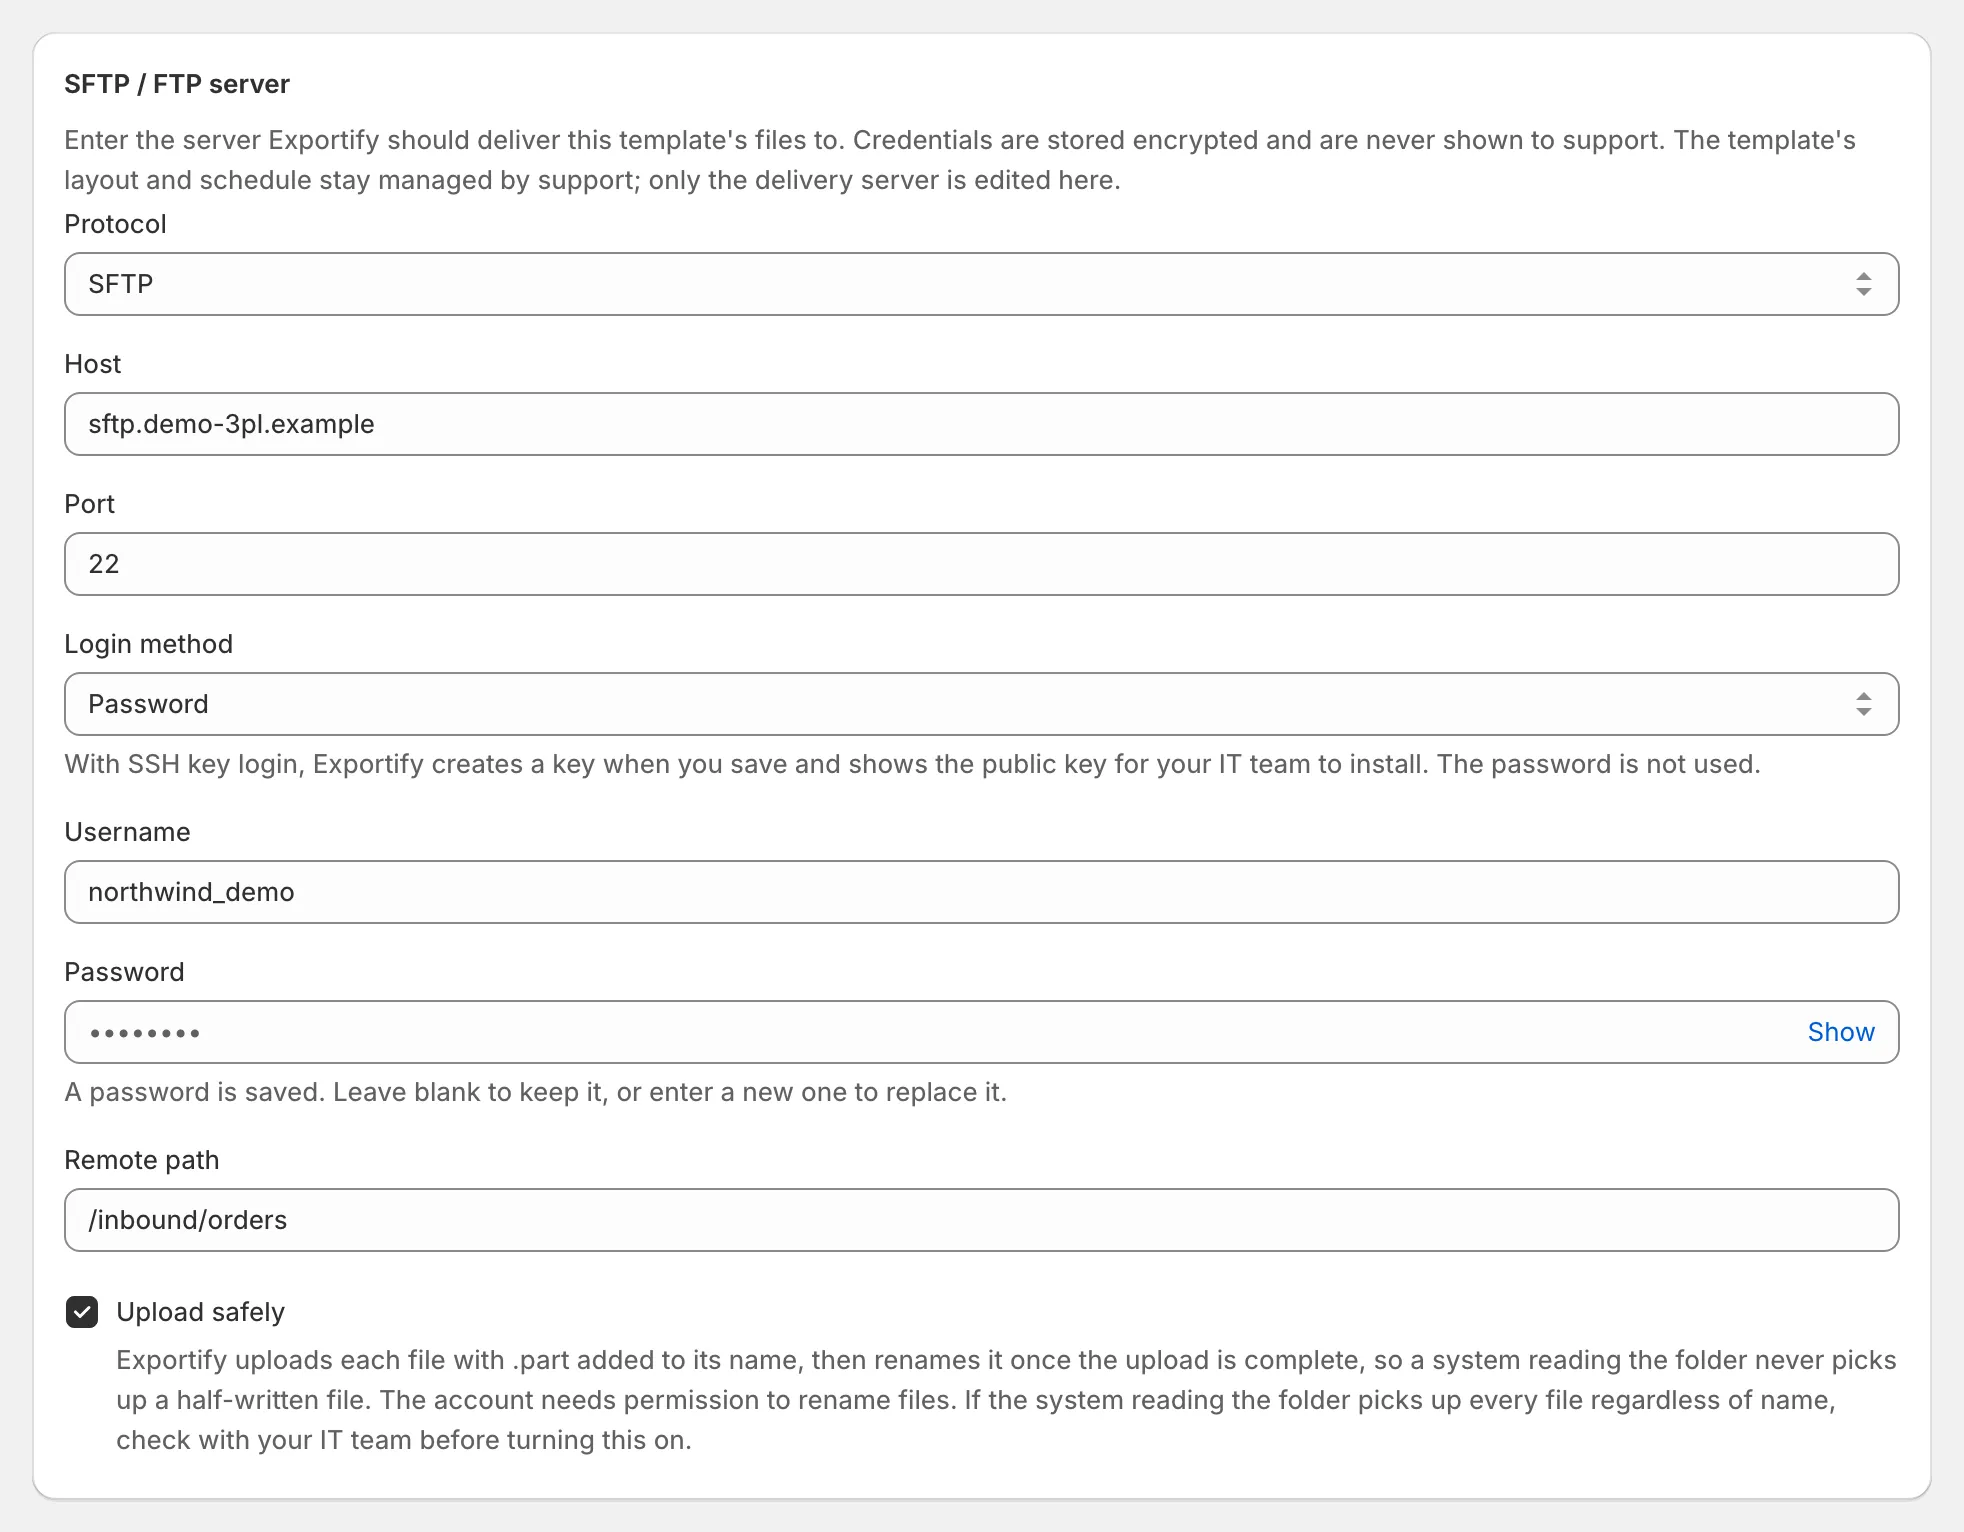
Delivery settings: the SFTP / FTP server form with protocol, host, port, username, password and remote path -
Test the connection. After saving, use Test connection. Exportify connects exactly as a delivery would and uploads a small timestamped text file to your folder, then removes it again if the account is allowed to delete files. A wrong host or port can take up to a minute to report.
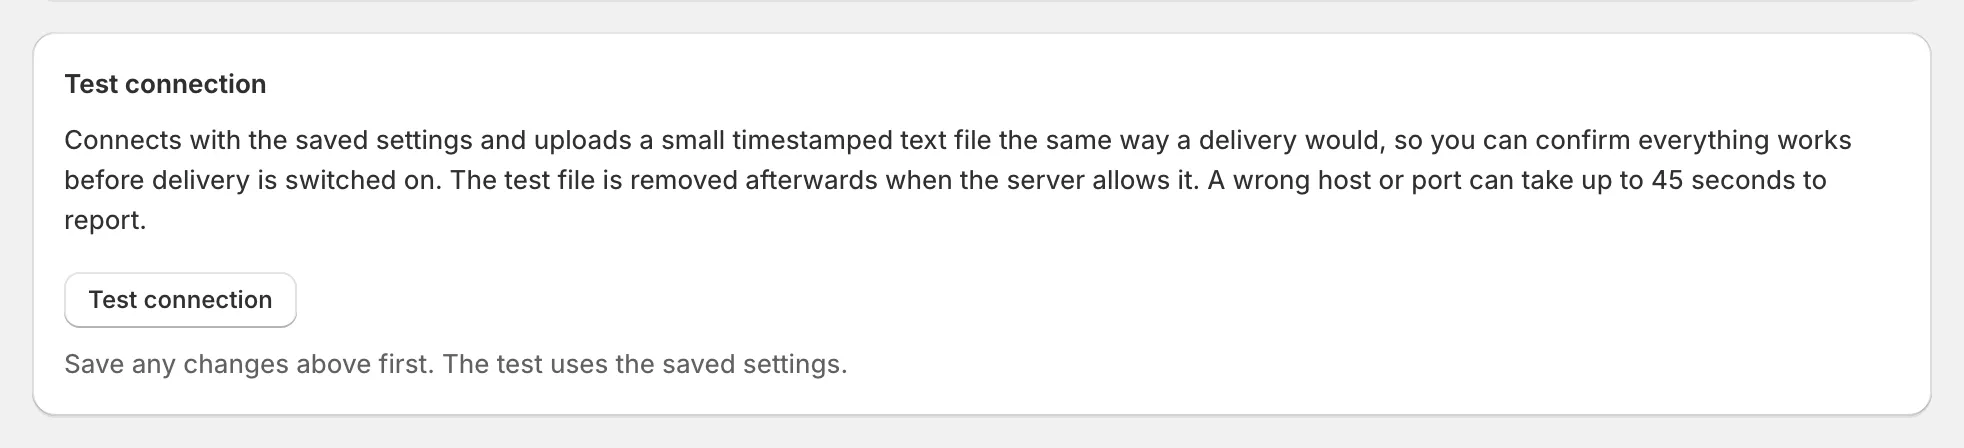
Delivery settings: the Test connection card -
Ask support to switch delivery on. Once the test succeeds and you can see the test file on your server, reply to your support conversation or email support@exportifyapp.com. We switch the template’s automated delivery to your server and confirm the first real file with you.
Log in with an SSH key instead of a password
Section titled “Log in with an SSH key instead of a password”Many IT teams require key login and will not issue a password. Set Login method to SSH key and save. Exportify creates a key pair for this template, keeps the private half encrypted, and shows the public half on the same page for your IT team to add to the account on the server.
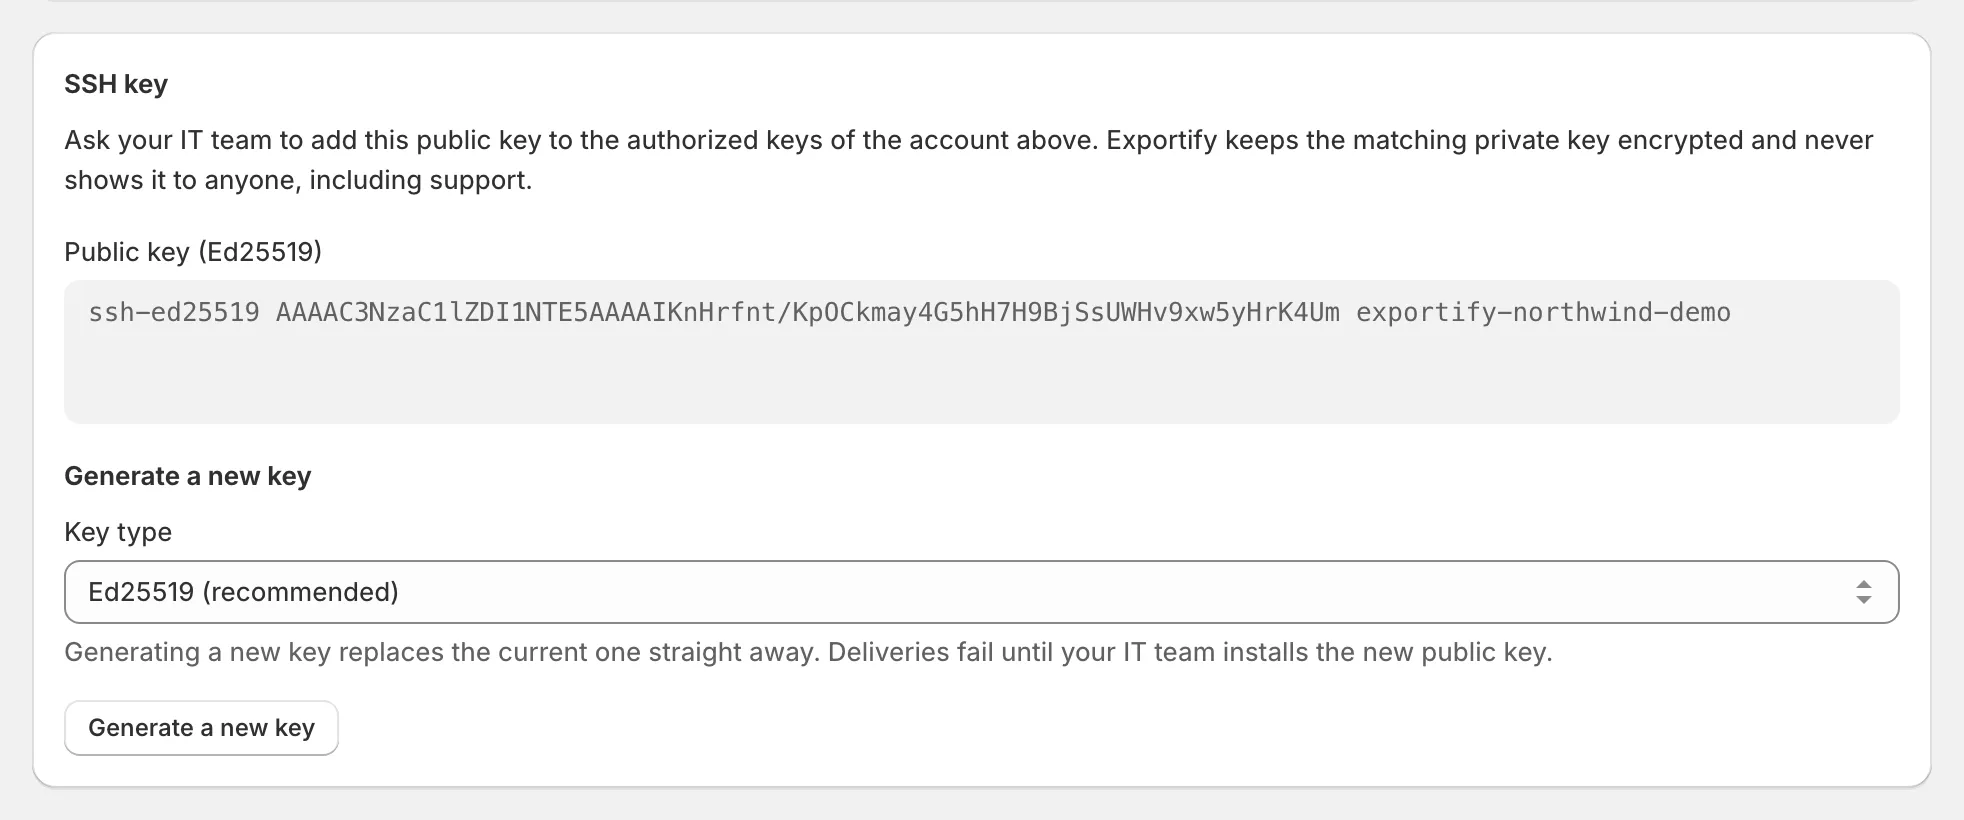
Ed25519 is used by default. If the server is older and does not accept it, generate an RSA key instead from the same card. Generating a new key replaces the current one straight away, so the new public key has to be installed before the next delivery runs.
The server identity check
Section titled “The server identity check”The first time Exportify connects successfully it records the fingerprint of your server’s SSH host key, and from then on it only delivers to a server presenting that key. Your IT team can confirm the fingerprint shown on the Delivery settings page matches the server.
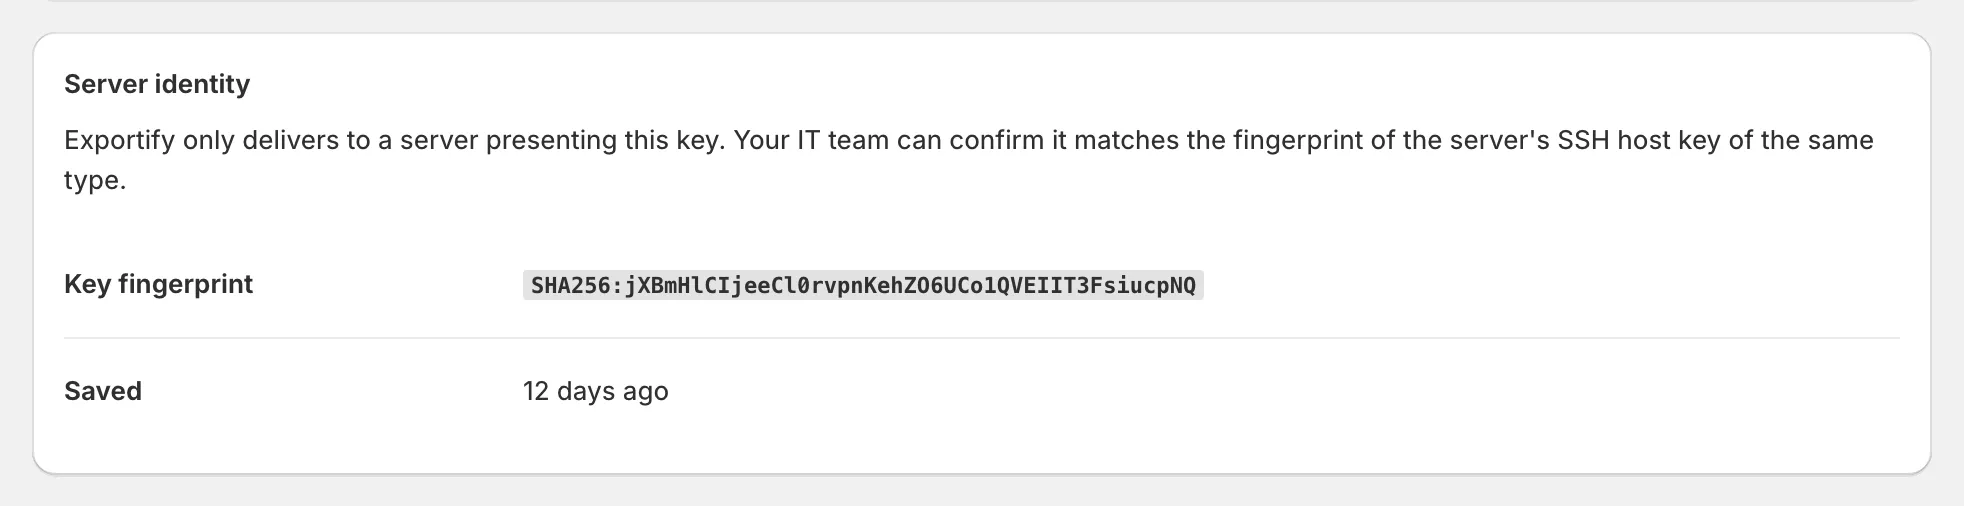
If the key ever changes, deliveries stop and the page shows both fingerprints. Check with your IT team before trusting the new key: a rebuilt or replaced server is the usual reason, and there is a Trust the new server key button for that case.
Uploading safely
Section titled “Uploading safely”Upload safely writes each file with .part added to its name and
renames it once the upload is complete, so a system watching the folder
can never read a half-written file. The account needs permission to rename
files in the folder.
It is on for new setups. If the system reading your folder picks up every file regardless of name, check with your IT team before turning it on.
Checking deliveries
Section titled “Checking deliveries”The Delivery settings page shows when the last delivery succeeded, when the last attempt was, and the reason if it failed. A failure caused by a network problem is retried automatically. A failure caused by a setting, such as a rejected password or a folder the account cannot write to, waits for the setting to be corrected.
If the SFTP connection test fails
Section titled “If the SFTP connection test fails”The message names the host and port and the likely cause.

The most common problems are:
- a typo in the host name, or the wrong port for the protocol
- a folder the account is not allowed to write to. On many servers the account is locked to a top folder that is deliberately read only, and files have to go into a subfolder, so set Remote path to that subfolder
- a password or SSH key the server does not accept
- the wrong protocol (SFTP, FTPS and FTP are different services; check which one your server runs)
- a firewall on the server that does not allow connections from outside your network
Fix the detail, save, and run the test again.
SFTP delivery questions
Section titled “SFTP delivery questions”Can I change the server later? Yes. Open Delivery settings, change the details, save, and run Test connection again. Leaving the password blank keeps the saved one.
Does the file change? No. Delivery only changes where the file goes; the layout and file name are the template’s.
Which is better, SFTP or FTP? SFTP. It encrypts the connection and supports key login. FTPS also encrypts it, and needs a certificate issued by a public certificate authority. Plain FTP sends everything unencrypted and is supported for servers that offer nothing else.
Which IP address does Exportify connect from? There is no fixed address. Exportify runs on cloud infrastructure and its address changes. The guide for IT teams covers what to do when a policy asks for one.